When managing your online presence, it’s crucial to have expert help for efficient and effective domain management. Granting manager permissions to an agency on Namecheap can streamline this process, especially when it comes to technical tasks like updating nameservers. This allows agencies to handle essential changes like setting up a CDN with Cloudflare, which can enhance website performance, security, and reliability.
By giving an agency the necessary permissions, you ensure that they have the tools they need to optimize your domain. In this post, we’ll cover how to grant manager permissions step-by-step.
Why Grant Manager Permissions?
Granting manager permissions to an agency offers several advantages, including:
- Technical Expertise: Agencies have the knowledge to handle technical aspects like DNS settings and email forwarding.
- Optimized Performance: By updating nameservers to a CDN like Cloudflare, agencies can enhance website load times and overall performance.
- Improved Security: Cloudflare provides additional security features like DDoS protection and a secure SSL connection.
- Better Reliability: Using a CDN helps distribute content globally, reducing server load and increasing website uptime.
Step-by-Step Guide to Granting Manager Permissions

Step 1: Log in to Namecheap Account
Visit Namecheap and log in to your account using your username and password.
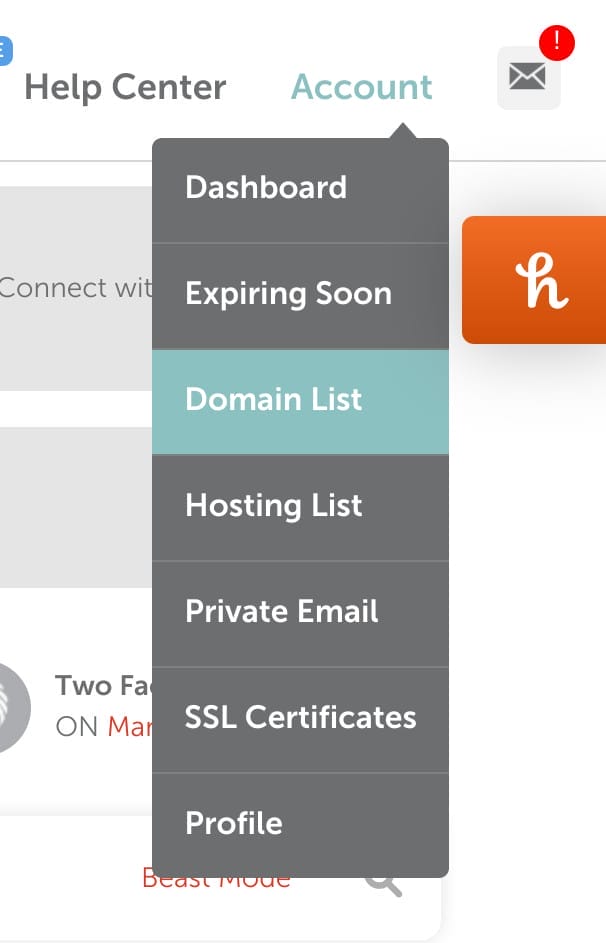
Step 2: Navigate to Domain List
After logging in, go to your dashboard and click on the “Domain List” tab, typically located on the left sidebar.
Step 3: Select the Domain
Locate the domain for which you want to grant permissions. Click on the “Manage” button next to it.

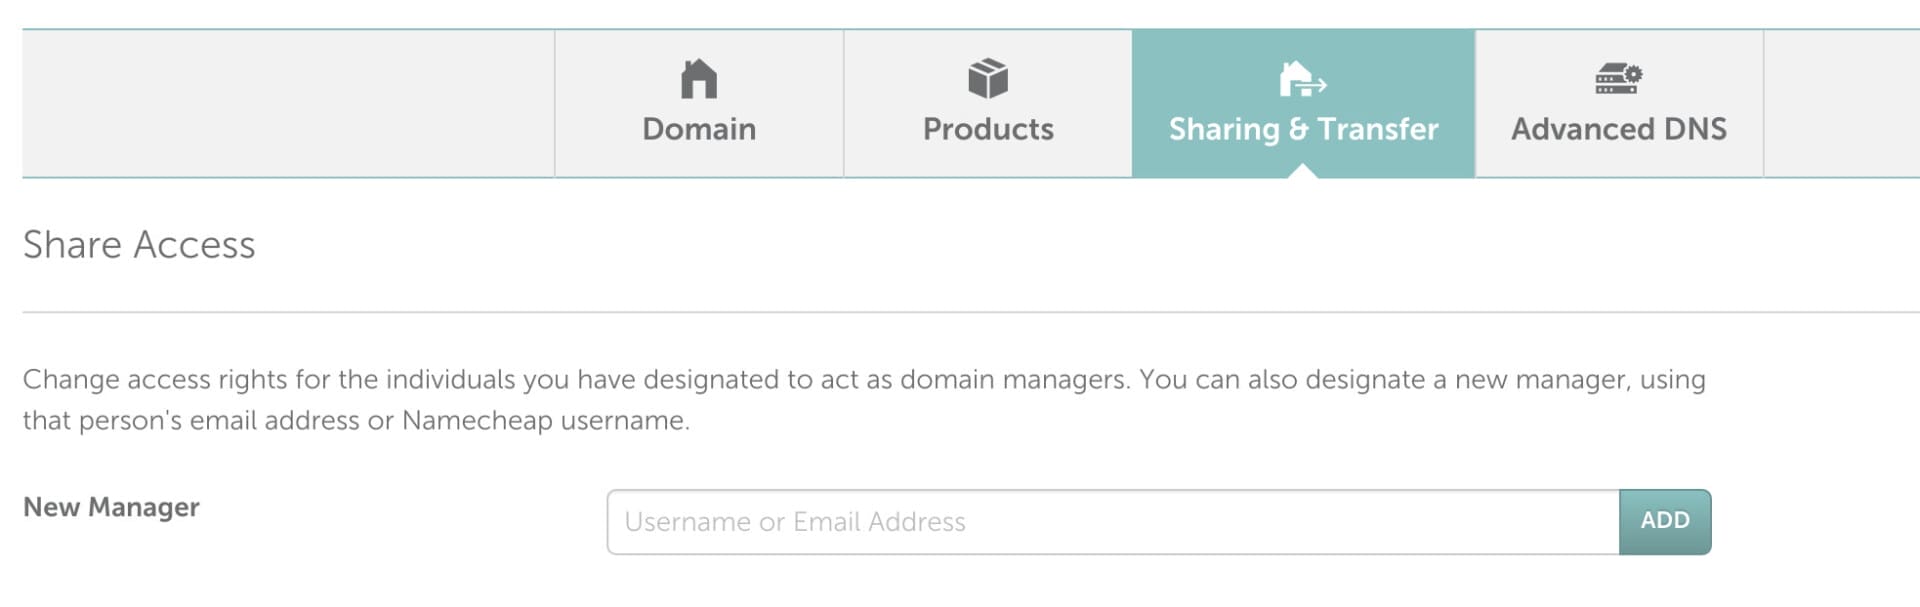
Step 4: Access the Sharing & Transfer Tab
In the domain management screen, find the “Sharing & Transfer” tab and click on it.
Step 5: Add a Manager
Under the “Sharing & Transfer” section, look for the “Add Manager” button and click on it.
Step 6: Enter Manager’s Email
In the pop-up box, enter the email address of the agency manager you want to grant permission to. Choose the “Full Permission” option to allow full control or select “Limited Permission” for restricted access.
Step 7: Confirm and Save
Once you’ve entered the email and set the permission level, click on the “Save” button to confirm. The manager will receive an email invitation to accept the permissions.
Step 8: Agency Accepts Invitation
After you’ve sent the invitation, the agency needs to check their email and accept the invitation. This will complete the process and grant them the necessary permissions.
Conclusion
Granting manager permissions on Namecheap to an agency is a smart move for clients who want to leverage expert help for their domain management. By following the straightforward steps outlined above, you can ensure that your agency has the necessary access to handle technical configurations, optimize performance, and enhance security.
Key Benefits
- Enhanced Performance: With access to update nameservers, an agency can integrate your domain with services like Cloudflare, significantly improving website load times and reliability.
- Improved Security: Cloudflare and similar services offer advanced security features, protecting your website from threats like DDoS attacks.
- Professional Management: Agencies have the expertise to manage complex settings, saving you time and reducing the risk of errors.
Takeaway
By allowing an agency to manage your Namecheap domain, you’re investing in professional support that can enhance your website’s functionality and security. This collaborative approach allows you to focus on growing your business while experts handle the technical details.